Folder Automation on a Mac Using Automator

Introduction
We will be using ImageMagick and the Mac Automator to help us more easily do a common image conversion task. This can be useful if you commonly need to reduce image sizes for publishing to the web or for doing common conversions from one file type to another. The end result will be a process where you can simply drop a file in a folder and it will automatically do the conversion.
We will be using ImageMagick to process the files and a custom script to run it.
Steps
- Install ImageMagick:
brew install imagemagick

# Confirm that magick command works
magick -help
- Next, using the Mac Finder, create a folder for your automation. Let’s call it
image_edit. Inside of theimage_editfolder, create aninputand anoutputfolder. The automation will run when we drop a file in theinputfolder, and the automation will then place the edited file in theoutputfolder. - Use Spotlight Search (Command-Space) to find Automator.
-
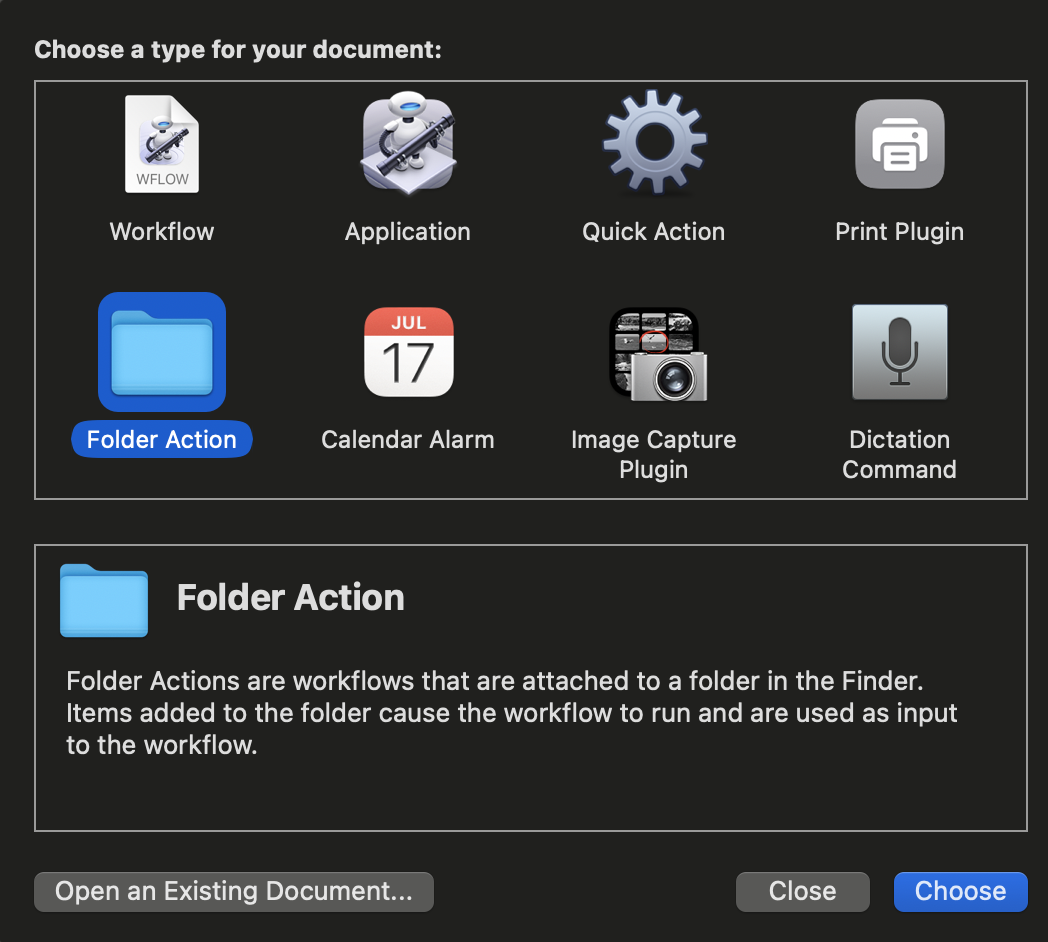
Once opened, select File / New and then select folder action
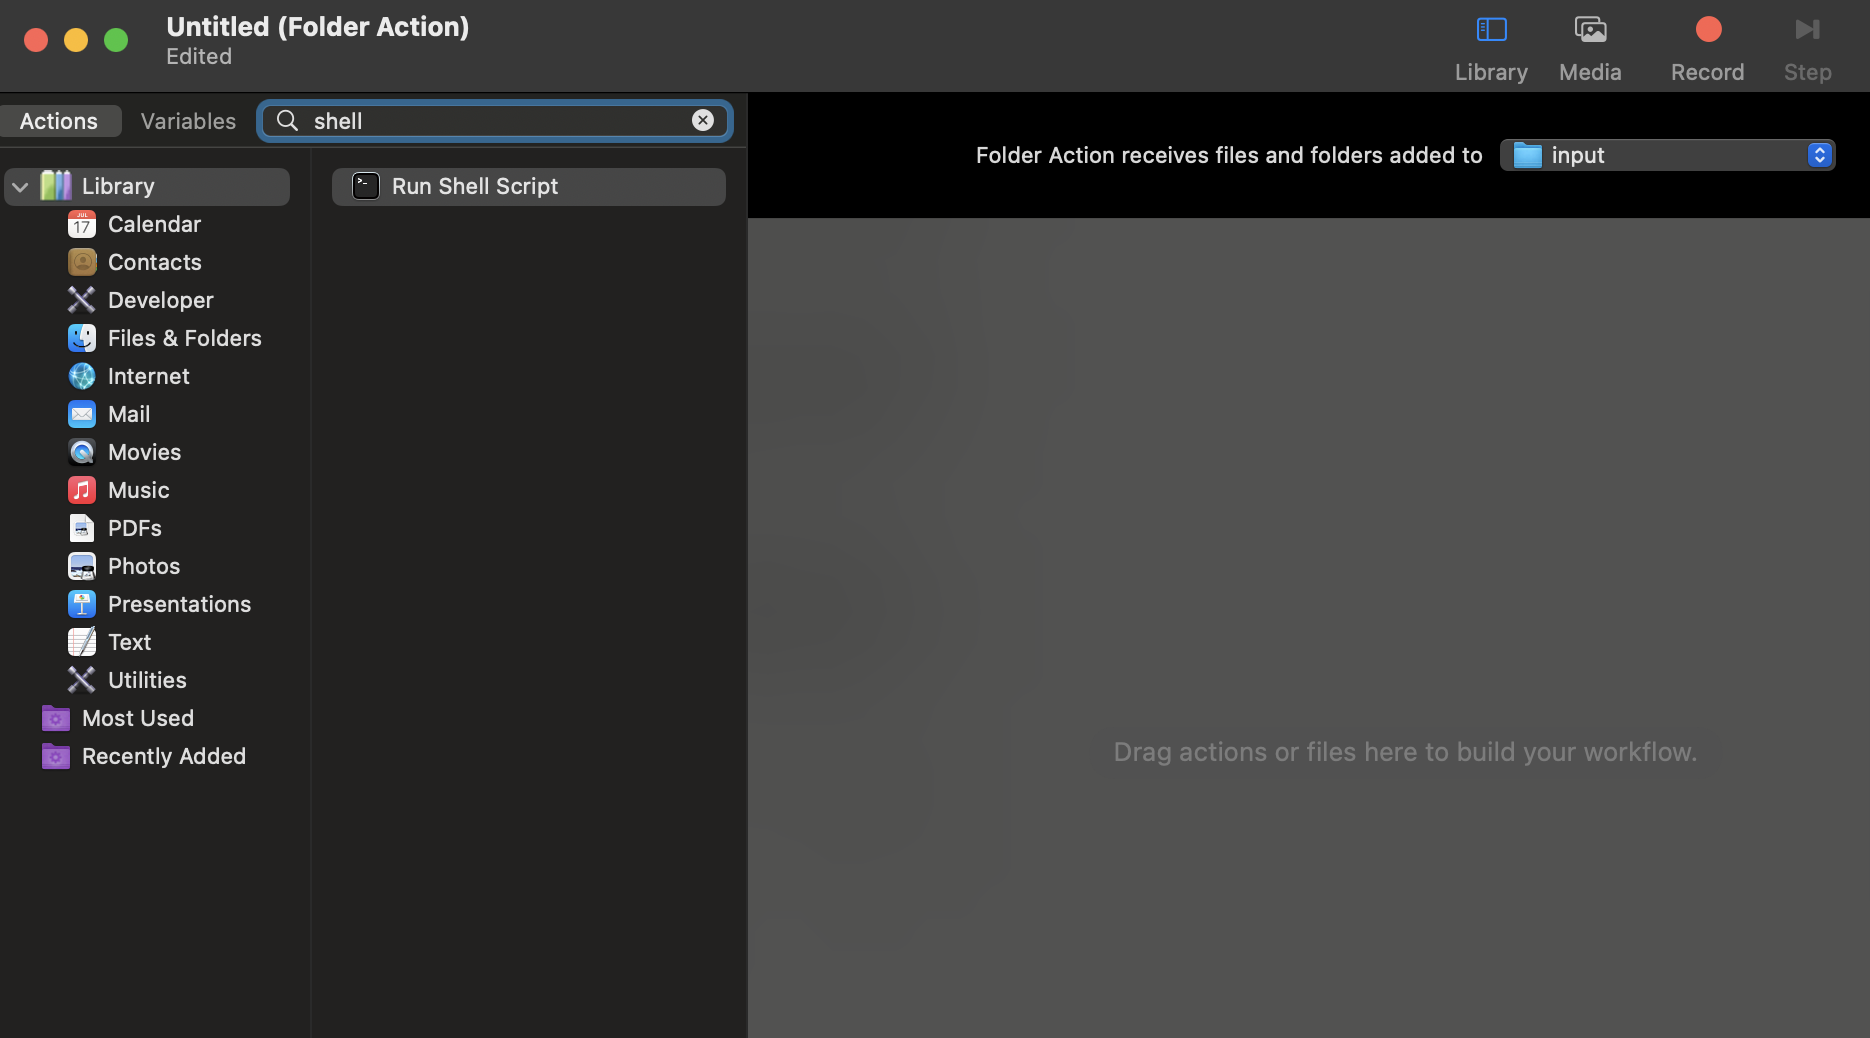
- Find the dropdown at the top labeled Folder Action receives files and folders added to. Use the dropdown to select the
inputfolder that was created. -
In the search field, type shell to easily find the Run Shell Script action. Drag it over to the Main section of the window.
-
Keep the Shell as
/bin/zshand change the Pass input toas arguments. At this stage, the automator may show an example script within the action as shown: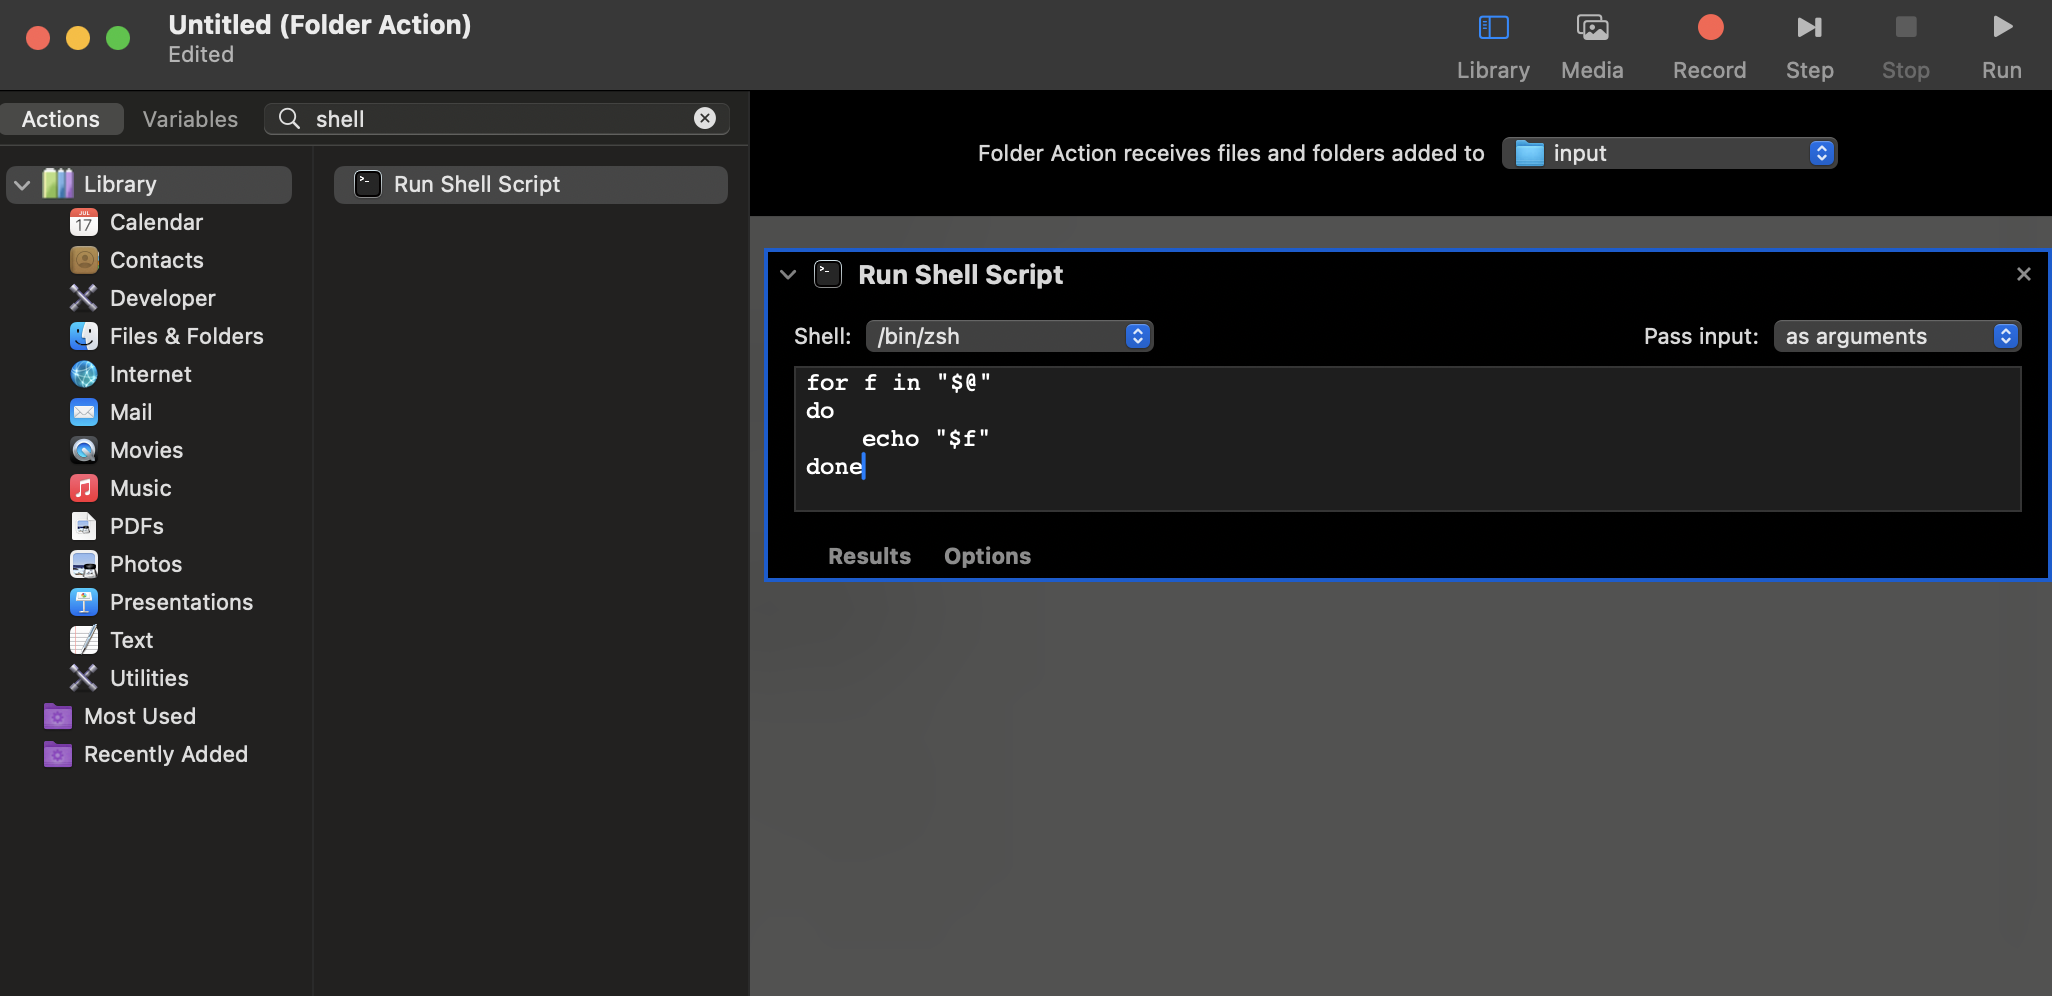
- Create a shell script in the
image_editfolder that will edit the image. In our case, we will have the script run ImageMagick on the image to have it with a specific quality and dimension, and to have it standardized as a JPG. Regardless of the format you drop in the folder, ImageMagick will attempt to make the adjustments and save the file as a JPG.
#!/bin/sh

# The variable '$f' will hold the path to the file that was added.
for f in "$@"
do
	# Add echo command to validate the automation is running
    echo "$(date): New file added: $f" >> ~/Documents/folder_action_log.txt

    # Get the base filename without the extension
    filename=$(basename "$f")
    name_no_ext="${filename%.*}"
    output_file="$HOME/Documents/Scripts/image_edit/output/${name_no_ext}.jpg"

	# Use more echo commands for troubleshooting only
    echo "output_file: $output_file" >> ~/Documents/folder_action_log.txt
    echo "name_no_ext: $name_no_ext" >> ~/Documents/folder_action_log.txt
    echo "filename: $filename" >> ~/Documents/folder_action_log.txt

	# Run ImageMagick with desired options and delete original file
    /opt/homebrew/bin/magick "$f" -strip -quality 90 -resize 1024x628\> "$output_file"
    rm -f "$f"

done
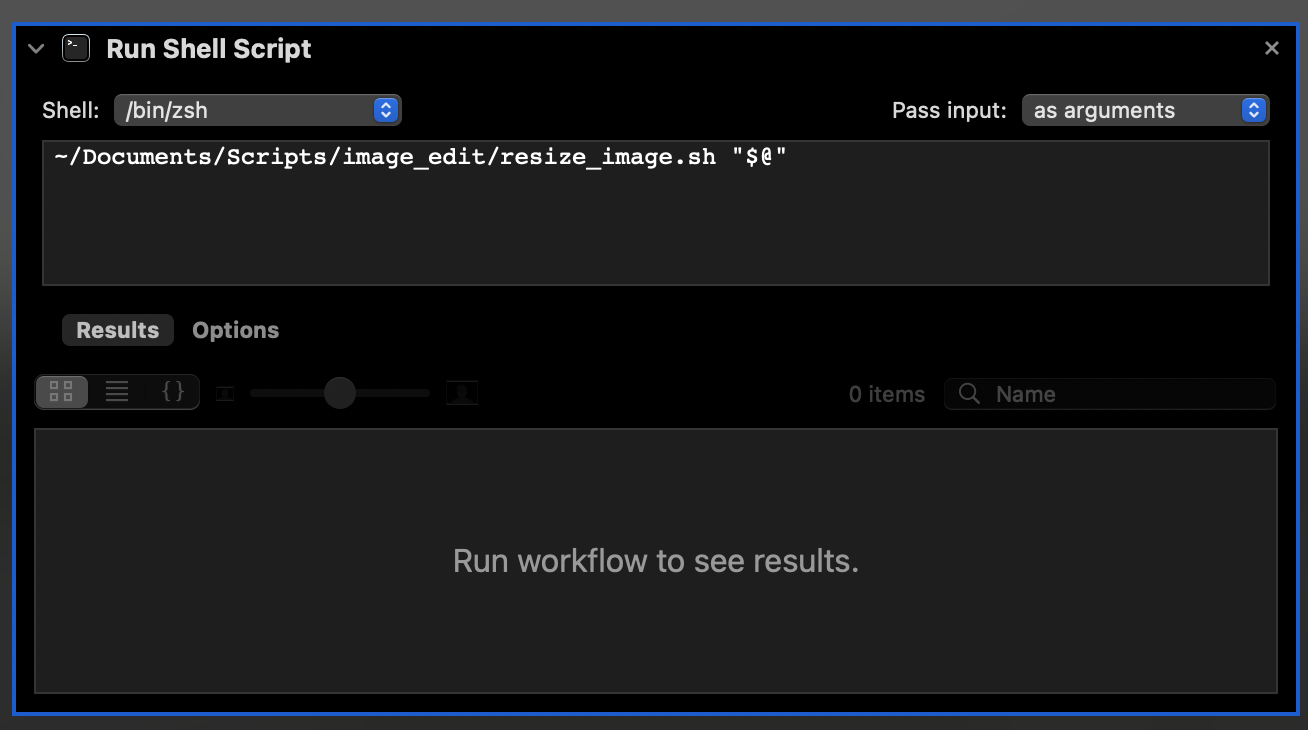
- After the shell script has been created, you can now tell Automator where the script is located and add a placeholder for the arguments. Automator will use the full file name (using a full path) for the argument. Example:
-
In the Finder, go to the
inputfolder and select Services and then Folder Actions Setup.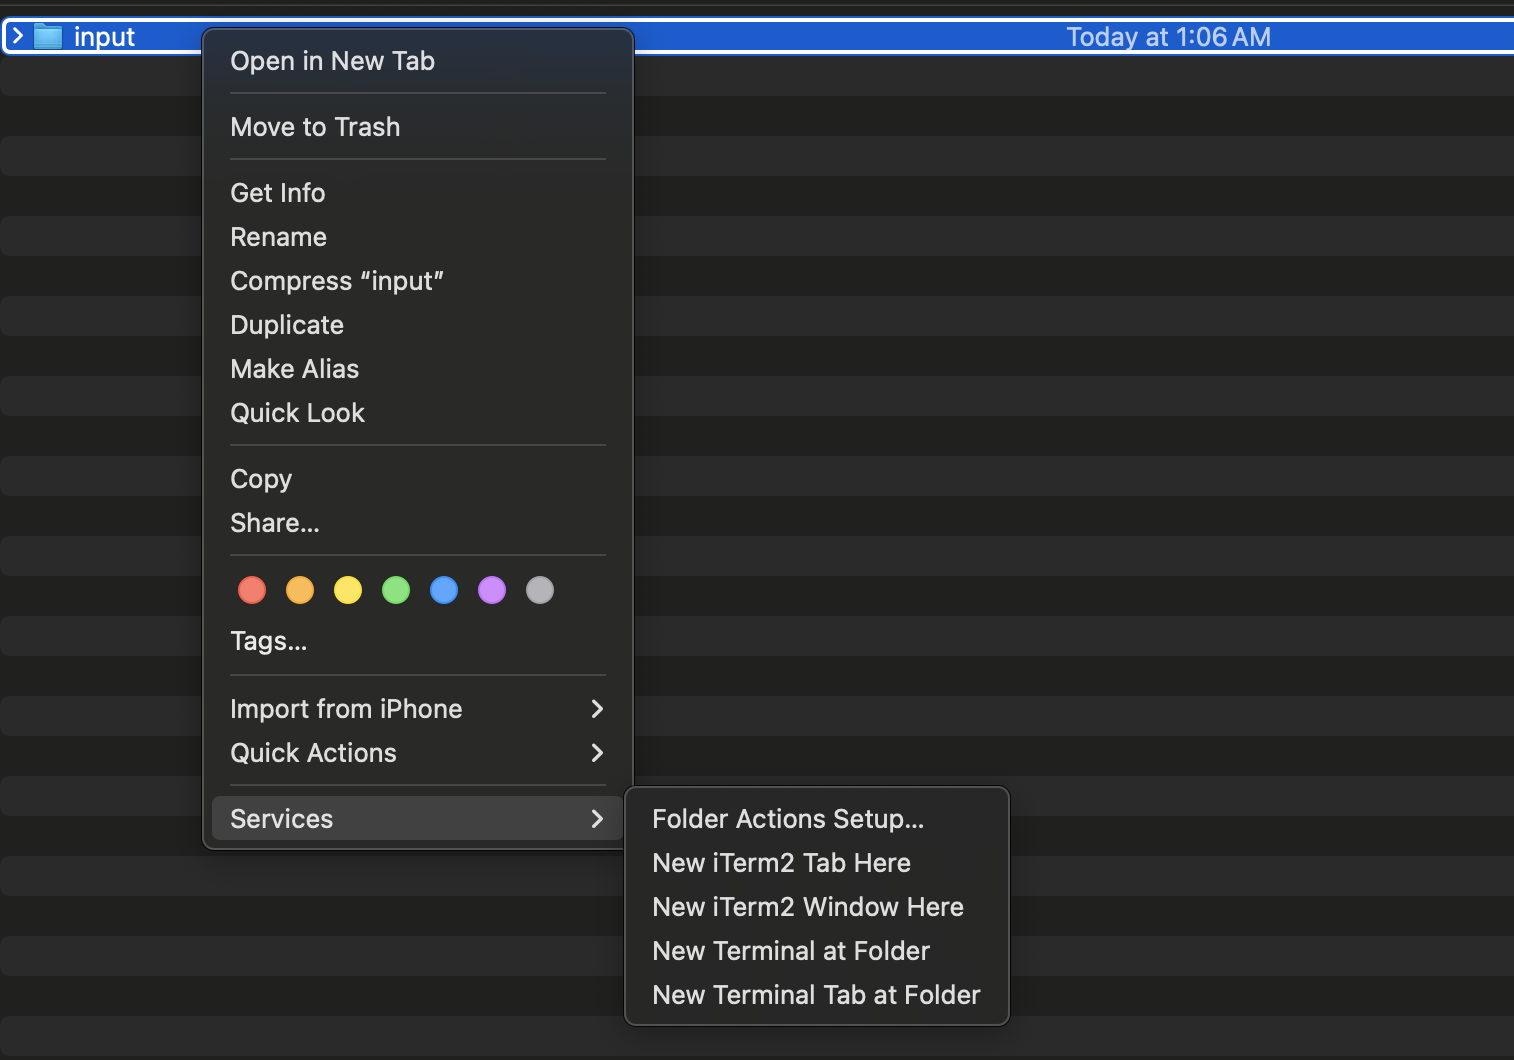
- Select Run Service if a pop up appears.
- Choose a script to attach. Attach the script from the list shown.
- You should see the folder name and the script name in the Folder Actions Setup window.
Test and Troubleshoot
Test the automation by dropping an image in the input folder. You should see a new file created in the output folder and the input folder file should disappear. Notice that the sample script provided will use echo commands to send output to a file. This can be very helpful during testing to make sure that the script is running properly. You may want to remove those commands once the script is working properly to avoid having a huge log file.